

SYSTEM BOOT · MGHouse OÜ
MGHouse
00%
MGHouse OÜ · STUUDIO
Blog · how to build right

100 building tips

A practical builder's checklist from the MGHouse site managers: foundation, walls, roof, insulation, engineering, finishing, budget and upkeep. No fluff — only what saves money and nerves.

100 tips

FoundationFoundation
01

Start with geology, not the design

Order a geotechnical survey before choosing the foundation type: drill at least 2–3 boreholes 4–5 metres deep to determine the soil type and groundwater level. It is cheaper than any rework and decides whether you need a slab, a strip footing or piles.

FoundationFoundation
02

Account for the frost depth

In Estonia the soil freezes to a depth of 1–1.2 m, so lay the strip footing below this level or insulate it as a shallow frost-protected foundation. Otherwise frost heave will lift and crack the structure every winter.

FoundationFoundation
03

Insulated slab for frost-susceptible soils

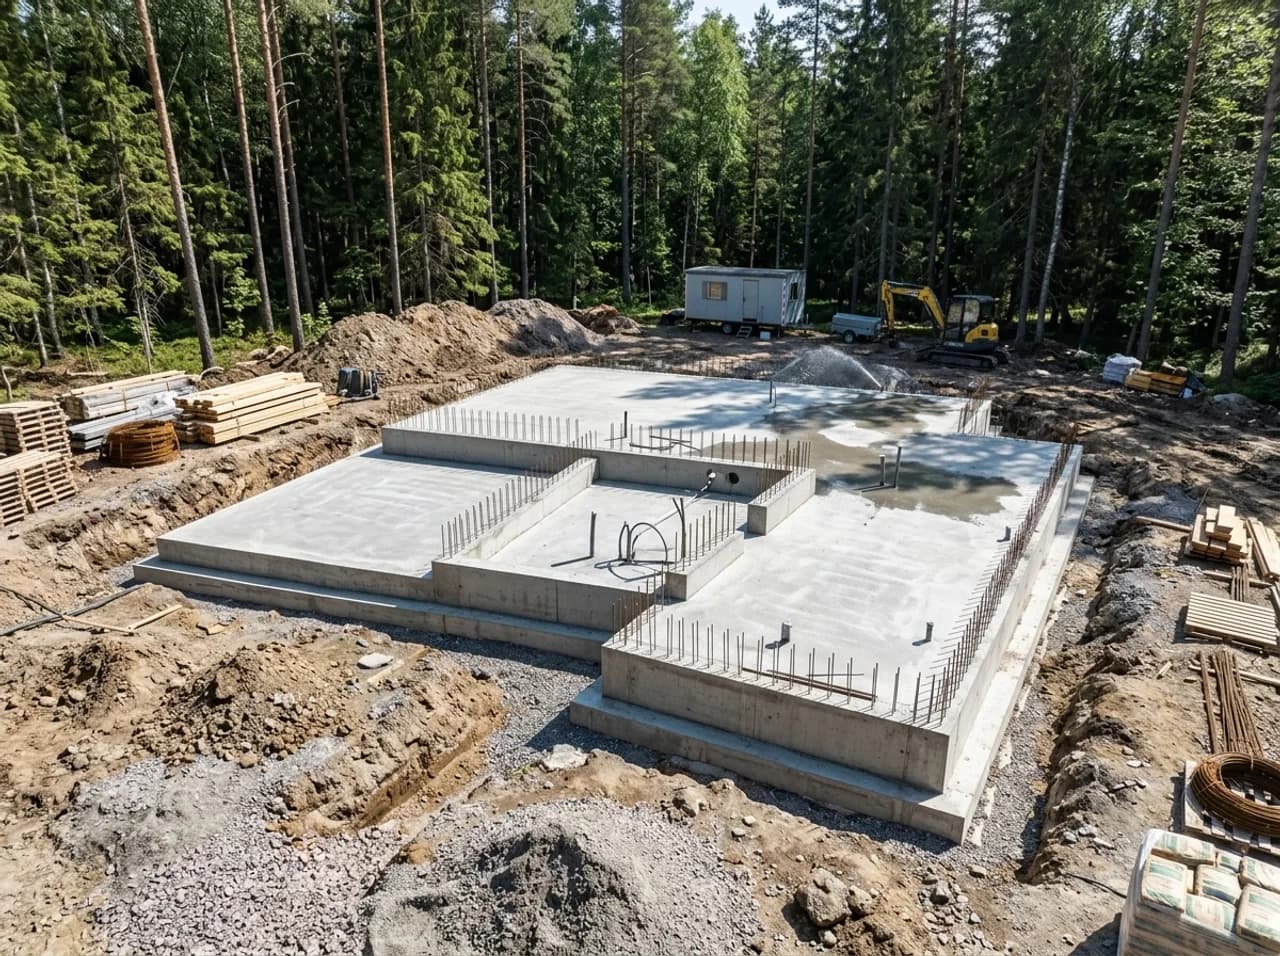
On clay and loam with a high water table an insulated Swedish slab is often more cost-effective than a strip footing: it is immune to frost heave and delivers a ready-made heated floor with its piping. A non-heaving sand or crushed-stone bed under the base is mandatory.

FoundationFoundation
04

Lay the drainage right away

A perimeter ring drain below the footing and routing water away from the house protect the foundation from undermining and basement damp. Relaying the drainage after backfilling and landscaping costs many times more than doing it straight away.

FoundationFoundation
05

The sand bed matters more than saving money

Under the base lay a 30–50 cm bed of non-heaving sand or crushed stone, compacting it layer by layer with a plate compactor. An uncompacted bed leads to uneven settlement and wall cracks within a year or two.

FoundationFoundation
06

Check the rebar before the concrete

Before the pour, check the rebar diameter, spacing and cover against the design: the concrete cover at the bottom should be 50–70 mm, otherwise the rebar will be exposed and rust. Photograph the cage — it is your argument in any dispute with the crew.

FoundationFoundation
07

Only factory concrete with a certificate

Use concrete of at least grade C25/30 (B25) delivered by mixer truck and demand a batch certificate; do not mix it by hand on site. For wet soils specify a watertightness grade of W6 and a frost resistance of F150.

FoundationFoundation
08

Control the concrete slump

On site, check the workability of the concrete: a mix that is too fluid (watered down on the spot) loses 20–30% of its strength. Do not let the driver add water to the drum for the sake of an easier pour.

FoundationFoundation
09

Vibrate, don't just spread

Compact the concrete with an immersion vibrator, not with a shovel or by shaking the rebar. Voids and honeycombing inside the foundation mean lost strength and pathways for water that cannot be fixed later.

FoundationFoundation
10

Cure the concrete for the first 7 days

After the pour, cover the foundation with film and keep it watered for at least a week, especially in heat and wind. Concrete gains strength in moisture; an over-dried top surface cracks and dusts, losing its design grade.

FoundationFoundation
11

Waterproofing around the whole contour

Separate the foundation from the walls with horizontal waterproofing and coat the vertical surfaces with bituminous or polymer mastic. Without this, moisture will rise into the walls by capillary action and cause mould in the very first year.

FoundationFoundation
12

Don't load a green foundation

Let the concrete gain strength: strip the formwork after 3–7 days, but start masonry and loading no earlier than 28 days. Rushing to erect walls on young concrete leads to settlement cracks.

Get a consultation

Let's talk about your project

Leave a request — we'll prepare a free quote and get in touch within one working day.

  • Free quote
  • Turnkey with warranty
  • Reply within 1 business day

We usually reply within 1 business day.